

How to Contour Your Face for Beginners
For a beginner contouring and highlighting may seem difficult because you don’t know where to start. The majority of us know we need to contour our cheekbones, underneath our jawbones, forehead and nose. You hear “You have to go by the shape of your face” and then we are all stuck wondering ‘I know my face has a shape, but where do I start? and what does that mean?’
In the Beauty world the ideal face shape that you want to achieve is the Oval. Reason being is because of the symmetry it provides. Symmetry is where one side looks like the other, but in the beauty world, the oval shape gives you that more natural, “perfect” look. (Besides the fact ladies, let just say that no matter what face shape you have we are all beautiful in our own way. Just had to share that with you.)
There are many face shapes: Round, Heart, Square, Oval, Pear, Rectangle, Diamond, etc. Again depending on your face is where you are wanting to contour and highlight.
What is Contouring?
Contouring is where you add shadows to your face to give it that more narrow look and appear smaller.
What is Highlight?
Highlight is where you make that area appear bigger or wider.
Something to Remember: Just because you saw someone contour a part of their face, does not mean that you have to. They may have a square face and you may have a round face, in which the contouring is different.
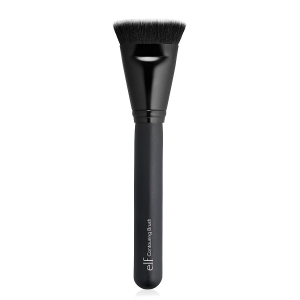
Tools You Need:
Blending Brush


Contour Brush
Contour Palette/Stick
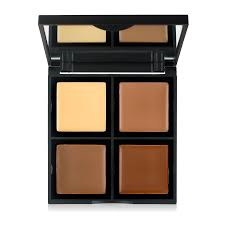
Contouring Product
A lot of Makeup Artist (MUA’s) like to use a cream contour product because when they buff it out, it gives them a more natural look. There is no wrong or right! You can use creams, you can use powders, it’s whatever you feel comfortable with!
TIP: If you use a liquid or cream foundation, use a cream contour powder.
TIP: If you use a powder foundation, you want to use a powder based contour product.
Contour Product
Once you are done applying your foundation, you want to apply your contour. (Or you can apply the contour before you apply your foundation to give you a more natural and subtle look).
TIP: If you can see the contour product then you used too much. You want to make sure that when you finish blending that your contour looks natural and soft.
TIP: Apply the contour cream product from the back of your hand to heat up the product.
When applying contour, stay away from the warm tones. For example: using a bronzer is not good for contouring. You can use bronzer to add definition and warmth.
Face Shapes:
Heart Shape: Cheekbones, Temples and Forehead
- You do not need to contour your chin area because it already has that “V” shape and most heart-shaped faces have great cheekbones, so you don’t have to contour as much in that area as well.
Square Shape: Cheekbones, forehead and Jawline
- With your cheekbones, try to bring them down a bit because you want to try to make that area more hollow by going towards the jawline.
Oval: Cheekbones
- You mainly want to accentuate on the cheekbones. Make them look sharp and fierce.
Round Face: Outer edges of the face, Temples, Cheekbones and Jawline.
- To give you that “V” shape in your chin area, contour the jawline and go just a little bit up by the sides of your chin.

Contouring
So basically what you want to do is place on an imaginary Oval on your face. Any parts that do not fit into the imaginary oval is where you want to contour (add shadow).
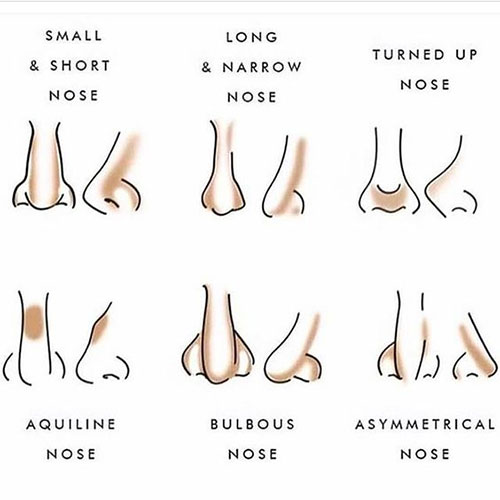
TIP: Nose – when contouring your nose, the more far apart the two lines are, the more wider your nose looks. If you want your nose to look more higher, add contour underneath the nose bridge. – (Contouring your nose can be done with any face shape).
TIP: Forehead – If your forehead is bigger and you want it to appear smaller, be sure to contour the perimeter of your forehead to give it that smaller, shadowed appearance.
TIP: Jawline – If you have a wide jaw and you want it to appear smaller, you can contour a little bit above from under your chin to give it that narrow appearance.
TIP: Lips – If you want your lips to look fuller, you can contour underneath your lip and on your cupids bow to give your lips a more pouty look.
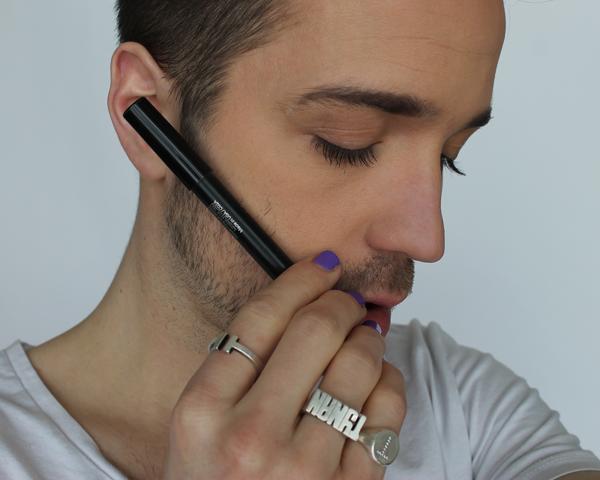
When applying the contour to your face, make a fish face. In the indentation is where you want to apply your contour. Allowing the thickest part to be where your hairline begins and the smallest area toward your face.
Highlighting
Once you have your contouring done, you want to add your highlight to the areas that you want to have stand out. These features include: Cheeks, Chin, your T-zone and under your eyes.
TIP: When applying highlight underneath your eyes, you want to create an upside down triangle.
TIP: You can highlight the chin area to make it stand out more, but if you have a Heart shaped face you already have that natural “V” shape within that area, and so your chin already stands out.
Blending
When blending your contour, you want to blend outward away from the face. There is one exception, though your cheekbones are contoured, you want to blend that up, like with a rounder face because your cheeks may be a bit on the chunkier side and that will give you a slimmer and more oval look. You also want to blend up to give that area of your face definition. While blending your face try not to rub to product, but pat on the product instead to keep the product in place. You really just want to soften the contour, not take it away.
Once you have your contour and your highlight, set your base or translucent powder to set your makeup into place. This will allow your contour and highlight to last longer.

Applying Contour on Others
If you are applying contour on others, when applying the contour to their cheek bones, you want to start from where the top of their ear starts and go as if you were outlining an upside down triangle, bringing the contour towards the lips, but not past the pupil of the eye.
Also when applying contour to someone else’s face be sure to see what shape of face they have because you want to use that as a guideline to contour and highlight their face.
Well dolls, that is all for this post. I hope that you enjoyed reading it. Please be sure to let me know your thoughts in the comment box below. Is there anything I missed? go ahead and add it to the comments. Be sure to subscribe for more Tips and Tricks. Again, thank you for reading and until next time lovelies!
XoXo – Nena Stylez
PS, if you loved this and love to find deals as well, check out the “Deals & Steals” page under Home Tab for cool finds and amazing sales. ❤

7 replies on “Contouring Your Face”
Beautiful explanation! I think this is the most thorough and clear explanation to contouring I’ve seen/read. Great job!
LikeLiked by 1 person
Thank you linda. It took me all day to do, but well worth it!
LikeLiked by 1 person
[…] techniques for them, just like my post, “Contouring Your Face”, which you can read here if you haven’t already. Nose surgery is expensive and or it’s just a scary thought. […]
LikeLike
[…] Well that’s all I have for this post and I hope that I was able to help some of you with some of your foundation questions and hope that you enjoyed reading it. I also have a “How To: Contour” that you can read by clicking here. […]
LikeLike
[…] → Click Here ← […]
LikeLike
Love this. Super informative! Thank you
LikeLike
Your very welcome!
LikeLike